
Thunderstorms with severe wind gusts and hail will be possible today across parts of the central Plains, and from the Missouri Valley into the upper Mississippi Valley. Heavy rain associated with the thunderstorms may also produce flash/urban flooding. Critical fire weather conditions expected in the Great Basin and interior Northwest. Dangerous heat continues across the Southwest and Southeast. Read More >
|
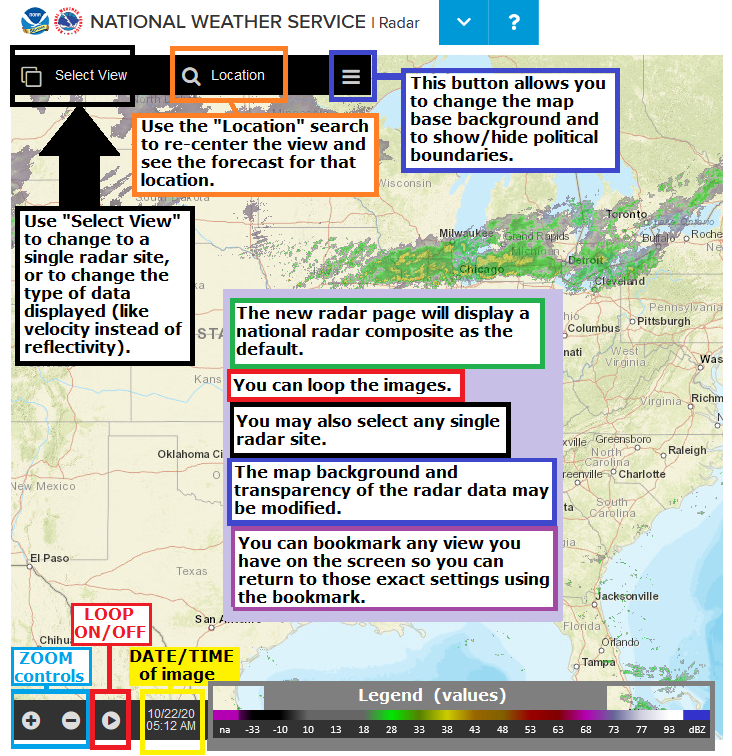
The NWS radar display https://radar.weather.gov/ has been implemented as of Dec 17th, 2020! The display has many options, and may take some time to become familiar with it. This is a short tutorial on how to use the interface. See the following images for tips, and read on for more details and familiarization exercises/procedures. Here is a link to a ~15 minute video stepping you through most of the tips below: https://youtu.be/5Bcq_t_SvG8 There is also an FAQ page from the folks who developed the new radar interface. Here's a link to our local Morristown TN (KMRX) radar site. You can bookmark this URL: https://go.usa.gov/xAgQV Special Thanks to NWS State College PA for this tutorial! |
| Single Radar: | Navigation: | Map settings: |
|
Start:
|
 |
|
Zoom in/out:
|
 |
|
Pan (slide the map around):
|
 |
|
Loop the image:
|
 |
|
Center on a specific town/location:
|
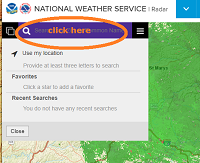 |
|
Select a specific/single radar site:
|
|
|
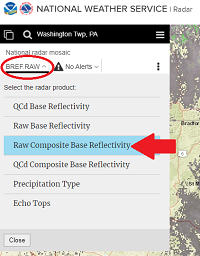
View different radar data for a single radar site:
|
|
|
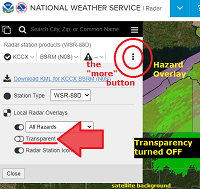
View more options in single-radar mode:
|
|
|
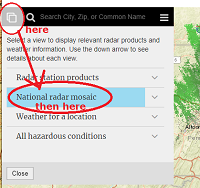
Go back to the National Radar Mosaic:
|
---- then -----
|
|
You can BOOKMARK any view you like ! Firm up your settings/preferences (location/zoom/radar image type/data/map background/transparency/loop) before you hit the: "bookmark this page" button/feature on your browser. |
 |
|
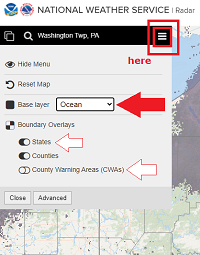
Choose Map Backgrounds:
|
-- changing transparency in done in single radar mode "more" window --
|


 Local Radar
 Huntsville Radar
 Regional Satellite
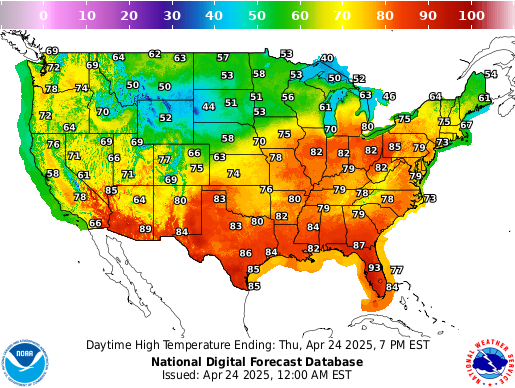 Graphical Forecast
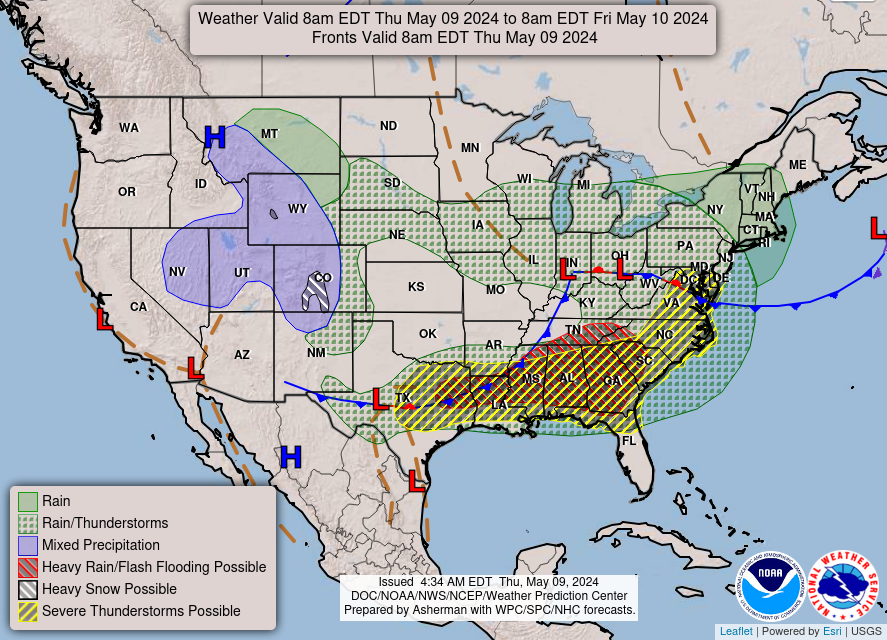 Weather Map